Showing posts with label Repair. Show all posts

Sunday, December 3, 2017

Leather Recliner Repair

Here is a large leather recliner that was in overall good shape, except for the arms.

Before:

PA210485

PA210486

PA210487

The sides also had a bit of pet damage.

PA210490

The leather had worn from a dark brown to a light brown, so the client chose a light brown for the repairs. We redid both arms and sides.

PA220510

PA220511

PA220513

Wednesday, October 25, 2017

Headley & Farmer Co. Antique Trunk Restoration (Cedar Lining)

This project falls into our 'repair and restoration' umbrella. We mainly do upholstery, here at Lefebvre's Upholstery, but we also do refinishing and repairs. There are a lot of projects that don't get photographed. This was was interesting.

This trunk was built as a vertical standing trunk, with an extending clothes rod. The client wanted the trunk cleaned up a bit (gold and black paint touched-up, ratty cloth removed where loose, missing nails or rivets replaced) and he wanted the clothes rod removed, and for the interior of the trunk to be lined with cedar, for use as a cedar chest.

P9050162

P9050167

You can see that this end (the top) has a curved hump in it.

P9050173

AFTER:

P9120221

P9120222

P9120223

P9120224

The borders of the remaining canvas near the edges were lightly trimmed, and painted black before the new cedar lining was installed. The same was done for the lid.

P9120226

P9120228

P9120229

Nice tight joints and corners.

P9120230

P9120232

P9120233

Tuesday, February 3, 2015

4 Antique Chairs - Red and Blue

Here are 4 antique chairs done for a client. There are two matching dining room chairs, a large arm chair, and a rocker. All these pieces were bought at auction, and they were in various states of disrepair. The new owner wanted all the old upholstery removed, and replaced with new foam, and all the frames repaired, stripped, and refinished.

Here are the before photos:


The fabric on this chair was actually originally a brilliant peacock blue and gold, and has faded to a pale mint colour.


There was a large (deep) crack through the back board.


Upholstery removed:


Here is the rocker:


The arms of the rocker with top fabric removed:


And here are the completed chairs. All the frames were completely knocked apart, stripped, reglued, and refinished. The client chose to have all the chairs finished in a dark chocolate brown, which looks very good with the rich red and blue fabrics. The original casters for the chairs were reattached later (we had not cleaned them yet when I took the photos).


Here is the rocker, which also needed several repairs to the frame.


And finally, the arm chair.


Saturday, January 3, 2015

Antique Arm Chair - Light Blue (Project of the Month July 2014)

I am far behind on updates to the blog, but I will be making several "backdated" additions today.

This is the Project of the Month from this past July. This chair was an exceptional amount of work to put back together, because of the numerous layers, multiple steps, hand stitching, and repairs that were needed.

I've condensed this project down to a manageable 24 photos, but I had dozens more that were taken during the process.

This was a HEAVY chair. For the average person, it's nearly unmovable. I'd say it weighs at least 40-60Lbs. Part of the reason for this (as you will see below) is that the chair has a massive wooden frame. Most of the wooden pieces are over an inch and a half thick, with the bottom rails being nearly 5 inches tall, and several inches thick. The hair also had a lot of heavy springs, and traditional horsehair stuffing (which is also quite heavy). The chair had been modified several times, and during our re-upholstery, we conferred with our client, and decided to return the chair as much as possible to the way it was originally.
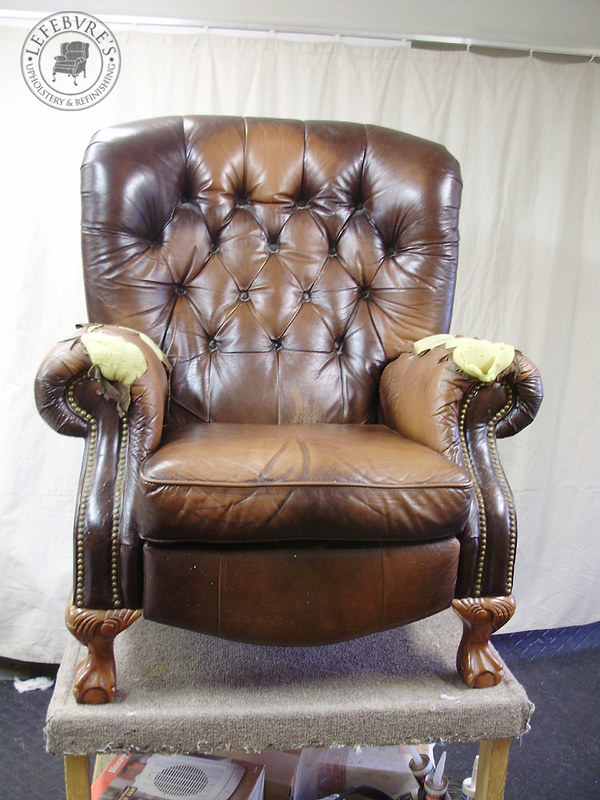
Before:


The deep-tufted back was a later (foam) addition. This photo shows the majority of the original upholstery.


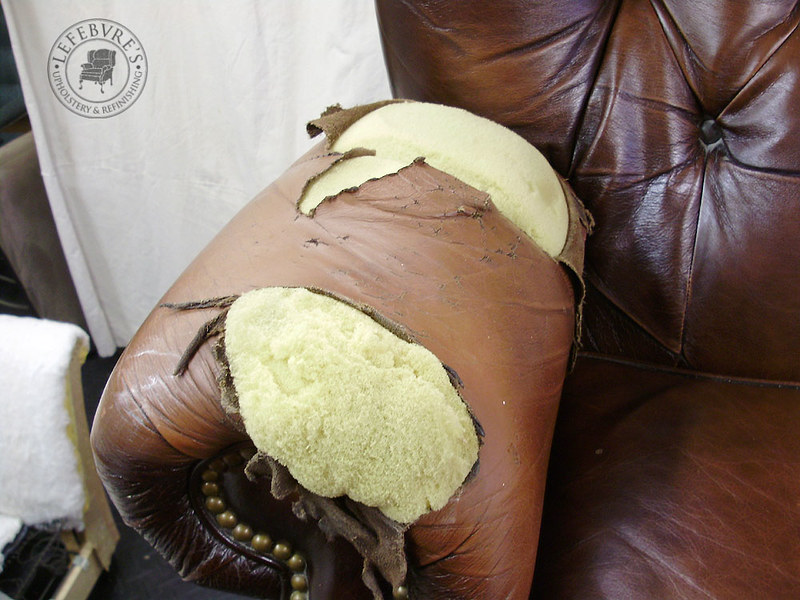
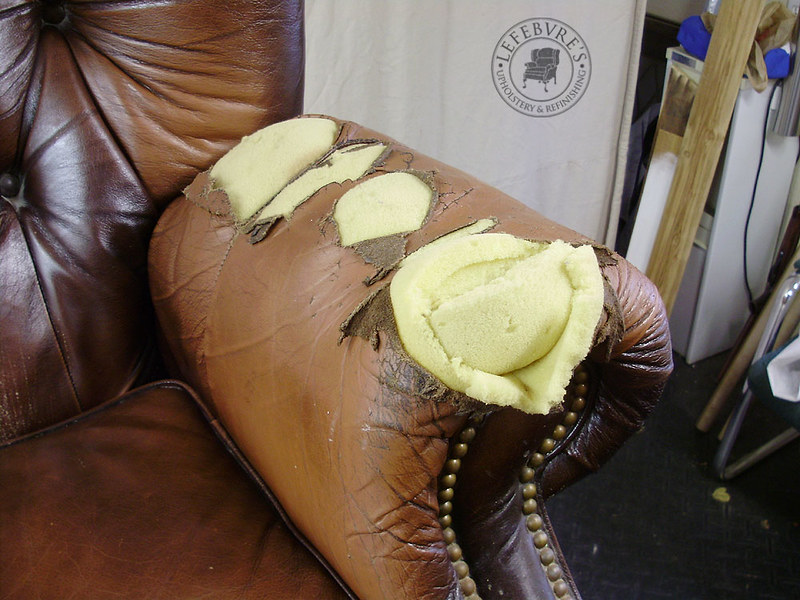
The front of both arms were originally round at the front, and someone cut them to be square.


The entire chair frame had been "repaired" by adding a large number of metal plates with lots of old wood screws. Despite all these added metal plates, the frame was loose and rickety, and we had to disassemble it and completely reglue it. It's hard to tell the size/weight of the frame, but just compare the size of the springs to the wood. The springs are around 4" wide on the ends.


Frame after repairs/re-assembly.


New webbing and spring ties.


Burlap, hand stitched to the springs.


Webbing on the back.


All the back springs were originally individually wrapped, and we redid this on the new upholstery. This takes more time than simply tying the springs to each other.


Because all the springs are basically "loose" from each other, they also need to be carefully hand tied to the base layer of burlap. Also note 3 large (very heavy gauge) lower lumbar springs. These were part of the reason that the client liked this chair.


First layer of stuffing (hair) and edge roll, hand stitched in place.


Second layer (horse hair/mixed hair).


With added cotton and muslin "rough cover".


Arms repaired, and ready with rough covers, seat fabric installed (all painstakingly hand stitched under the piping band).


Arms upholstered, and base layer (edge roll) installed on the back (see white muslin) followed by main horsehair stuffing.


Cotton layer added, followed by rough cover.


And finally, after more careful stitching, positioning, buttons, panels, skirts, and a bottom fabric, we have the completed chair.